Backup Validation: Restoring from Longhorn Backups
Testing the backup chain: etcd encryption with age, and a full Grafana PVC delete-and-restore to confirm Longhorn backups actually work.
Introduction
Backups that have never been tested are not backups — they're hopes. Everything built over the previous two posts — the ZFS pool, Garage S3, the Longhorn backup target, the Synology rclone sync — is only as valuable as the answer to one question: can I actually get my data back?
This post answers that question. It also covers the etcd and Talos state backup that was set up alongside the Longhorn infrastructure, which got less attention in the previous post but matters just as much: if the cluster itself needs to be rebuilt, etcd state is what makes that possible.
The restore test is Scenario 1 — restoring a single PVC on a healthy cluster. The workload chosen is Grafana: it has a real PVC with real data, it's easy to verify after restore (either the dashboards are there or they aren't), and it can be safely stopped and started without affecting anything else on the cluster. A future post will cover Scenario 2 — full cluster rebuild from off-cluster backups — once that's been tested.
🏠 This is part of the Homelab Journey series - building a production Kubernetes cluster from scratch.
- Offloading Backups to the Synology
- Backup Validation: Restoring from Longhorn Backups (you are here)
- Version Control for the Cluster
This post assumes Longhorn is configured with a working backup target and at least one completed backup exists for the volume being restored. The previous posts in this series cover setting up Garage S3 as the backup target and getting backups running automatically.
etcd and Talos State Backup
Before the restore test, the piece of backup infrastructure that was set up alongside Garage but not covered in detail: etcd backups via talos-backup.
Longhorn handles PVC data — application state. But the Kubernetes API server's state lives in etcd, and Talos's own configuration lives in the machine configs. If the cluster itself needs to be rebuilt from scratch, you need both. Without an etcd backup, a rebuild starts from zero: all workloads, all secrets, all namespace configurations, all CRDs — everything is gone. With an etcd backup, you restore to a known state.
How talos-backup Works
talos-backup is an official Siderolabs tool that runs as a CronJob inside the cluster. It uses the Talos API (not SSH, because Talos has no SSH) to extract an etcd snapshot, encrypts it with age, and uploads it to an S3 bucket. The encryption is important: the etcd snapshot contains all Kubernetes Secrets in the cluster — including the cert-manager TransIP API key, every Longhorn credential, and anything else stored as a Secret.
The encryption uses asymmetric age key pairs. The public key goes into the CronJob manifest (safe to commit to git). The private key goes into the password manager and stays there — you only need it when decrypting a backup during recovery.
Preparing the Talos API Access
talos-backup needs permission to call the Talos API from within a pod. This requires a machine config patch applied to the control plane nodes:
# talos-api-access.patch.yaml
machine:
  features:
    kubernetesTalosAPIAccess:
      enabled: true
      allowedRoles:
        - os:etcd:backup
      allowedKubernetesNamespaces:
        - talos-backup
The os:etcd:backup role grants access to the etcd backup API endpoint specifically — nothing broader. allowedKubernetesNamespaces restricts which namespaces can use this access.
Apply to rock1 first to confirm there's no reboot:
talosctl patch machineconfig --nodes rock1.vluwte.nl --patch @talos-api-access.patch.yaml
# patched MachineConfigs.config.talos.dev/v1alpha1 at the node rock1.vluwte.nl
# Applied configuration without a reboot
No reboot — apply to rock2 and rock3:
talosctl patch machineconfig --nodes rock2.vluwte.nl,rock3.vluwte.nl \
  --patch @talos-api-access.patch.yaml
This file is committed to git — it contains no credentials, only role configuration.
Generating the age Key Pair
The age tool generates the encryption key pair. On macOS:
brew install age
age-keygen
Output:
# created: 2026-03-08T...
# public key: age1...
AGE-SECRET-KEY-1...
Both the public and secret key go into 1Password. The public key is the only one needed in the CronJob manifest. The secret key is stored for recovery — it is never put in a Kubernetes Secret, never committed to git.
The CronJob
The etcd backup CronJob lives in ~/talos-cluster/bletchley/etcd-backup/:
# etcd-backup-cronjob.yaml
apiVersion: batch/v1
kind: CronJob
metadata:
  name: talos-backup
  namespace: talos-backup
spec:
  schedule: "0 2 * * *"
  successfulJobsHistoryLimit: 3
  failedJobsHistoryLimit: 3
  jobTemplate:
    spec:
      template:
        spec:
          containers:
            - name: talos-backup
              image: ghcr.io/siderolabs/talos-backup:v0.1.0-beta.3-5-g07d09ec
              env:
                - name: AWS_ACCESS_KEY_ID
                  valueFrom:
                    secretKeyRef:
                      name: talos-backup-s3
                      key: AWS_ACCESS_KEY_ID
                - name: AWS_SECRET_ACCESS_KEY
                  valueFrom:
                    secretKeyRef:
                      name: talos-backup-s3
                      key: AWS_SECRET_ACCESS_KEY
                - name: AWS_REGION
                  value: garage
                - name: CUSTOM_S3_ENDPOINT
                  value: http://garage-s3.garage.svc.cluster.local:3900
                - name: BUCKET
                  value: etcd-backups
                - name: CLUSTER_NAME
                  value: bletchley
                - name: AGE_X25519_PUBLIC_KEY
                  value: "age1..."  # public key only — safe in the manifest
Schedule is 0 2 * * * — daily at 02:00, before the rclone Synology sync at 05:00. The CUSTOM_S3_ENDPOINT points at the internal Garage ClusterIP service, same as Longhorn uses.
Verify it works without waiting until 2am:
kubectl create job talos-backup-test --from=cronjob/talos-backup -n talos-backup
kubectl get pods -n talos-backup -w
The pod goes from ContainerCreating to Running to Completed in about 45 seconds. Check the bucket:
kubectl exec -n garage garage-0 -- /garage bucket info etcd-backups
Size:    17.3 MiB (18.1 MB)
Objects: 1
17MB of encrypted etcd state, now in Garage and synced to Synology by rclone.
The restore procedure for an etcd backup is not covered in this post — that requires its own careful test. The starting point when needed is talosctl bootstrap --recover-from=<snapshot> for recovering a cluster from an etcd snapshot, or a manual etcdctl snapshot restore for lower-level recovery. In both cases the age-encrypted snapshot needs to be decrypted first using the private key from the password manager:
age --decrypt -i <private-key-file> <snapshot.age> > etcd.snapshot
Neither path has been tested on this cluster yet — that will get its own post before it's needed for real.
Understanding What's in a Longhorn Backup
Before running the restore test, it's worth understanding what Longhorn actually stores — because the Synology copy of the backup is not a simple file you can just put back.
After the rclone sync, the Synology shows the longhorn backup data in this structure:
longhorn-backups/
  pvc-710ed489-2d9f-48d8-8d86-83d86f71b85a/
    volume.cfg
    backups/
      backup_...    ← incremental backup files
    blocks/
      ...           ← content-addressed data blocks
volume.cfgcontains metadata about the original volume (name, size, Longhorn configuration)backups/holds the incremental backup manifests — each backup entry points to the blocks it needsblocks/holds the actual content, split into content-addressed blocks that are deduplicated across backups
This is Longhorn's internal format. The files on the Synology cannot be directly mounted or restored as a filesystem — they must be reconstructed through Longhorn. Longhorn reads the blocks and manifests from the S3 endpoint (Garage) and reconstructs the volume. The Synology copy is the disaster recovery layer — if the cluster and Garage are both gone, the blocks need to be imported back into a new Garage instance first, then restored through Longhorn. That's Scenario 2, tested separately.
Scenario 1: Restoring Grafana on a Healthy Cluster
The test simulates the most common real-world recovery situation: a volume is corrupted or accidentally deleted, the cluster itself is healthy, and you want to restore a specific PVC from its last backup.
Step 1 — Scale Down Grafana
For this test, Grafana is scaled down before taking the manual backup. Longhorn doesn't require this — it can back up an attached volume via crash-consistent snapshots — but for a restore test there's no point starting from a potentially inconsistent snapshot. Scaling to zero guarantees a clean state to restore from.
Crash-consistent means Longhorn snapshots at the block layer, the same way a sudden power loss would freeze the disk. The data is internally consistent at the storage level, but any writes that were in-flight or buffered in the application are lost. For Grafana this is fine — it's not a write-heavy workload and SQLite handles recovery from an unclean shutdown gracefully. For a database under active write load, crash consistency is not the same as logical consistency, and a restore might require a recovery step before the workload is healthy again.
kubectl scale deployment grafana -n monitoring --replicas=0
Watch the pod terminate:
kubectl get pods -n monitoring -w
grafana-7f585b964b-9nb22   1/1   Running     0   93s
grafana-7f585b964b-9nb22   1/1   Terminating 0   101s
grafana-7f585b964b-9nb22   0/1   Completed   0   102s
Step 2 — Confirm Volume is Detached
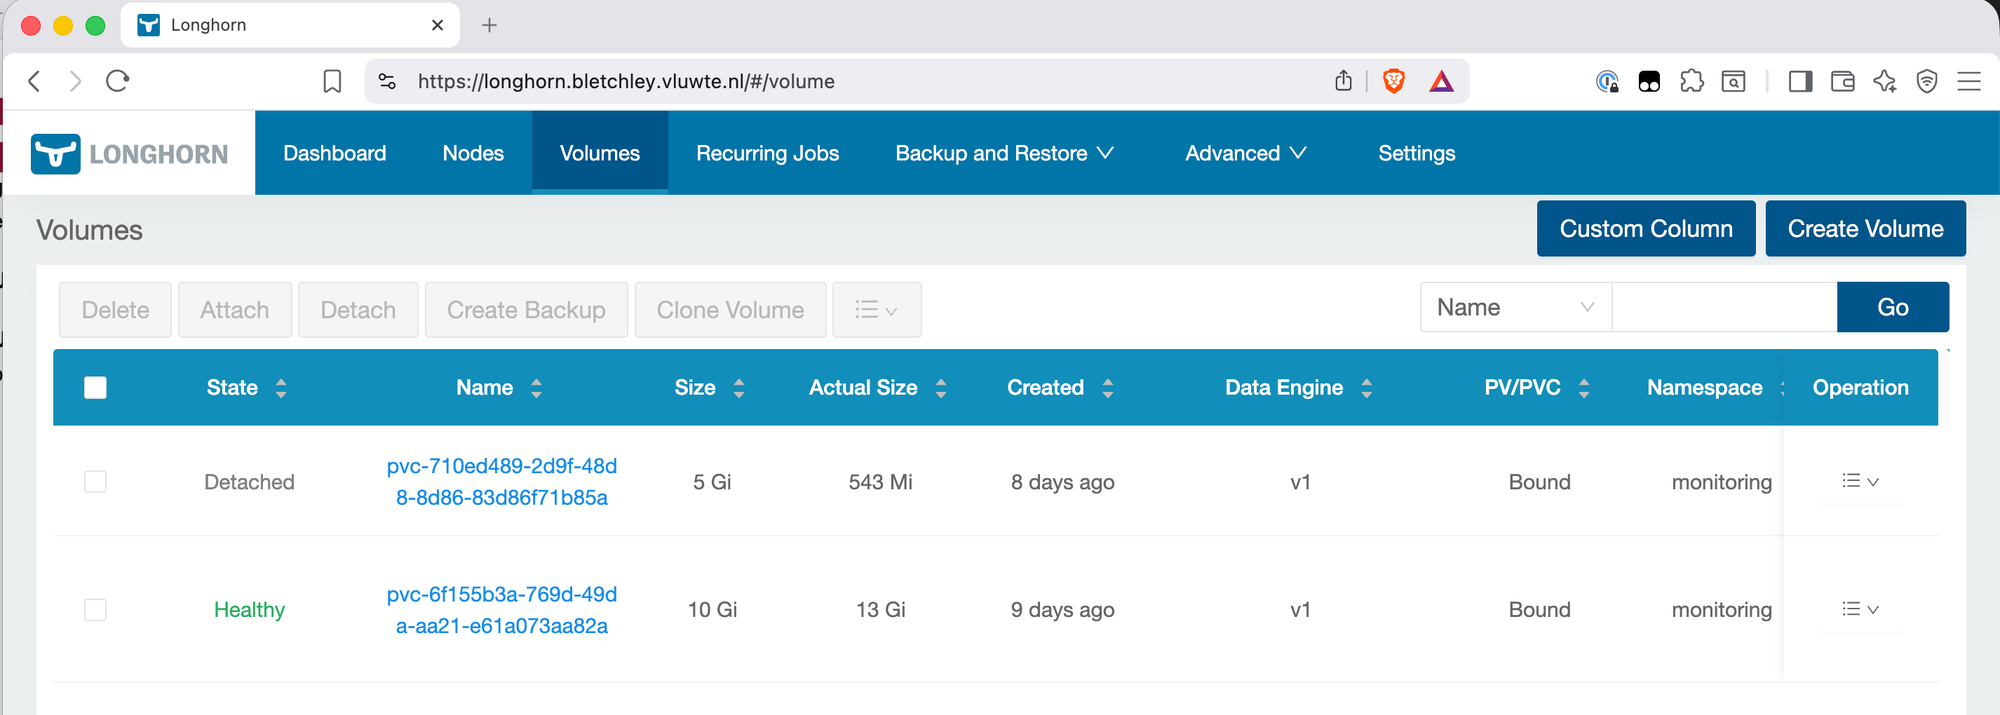
In the Longhorn UI, navigate to Volumes. The Grafana volume should show as Detached — this confirms no pod is holding the volume open.
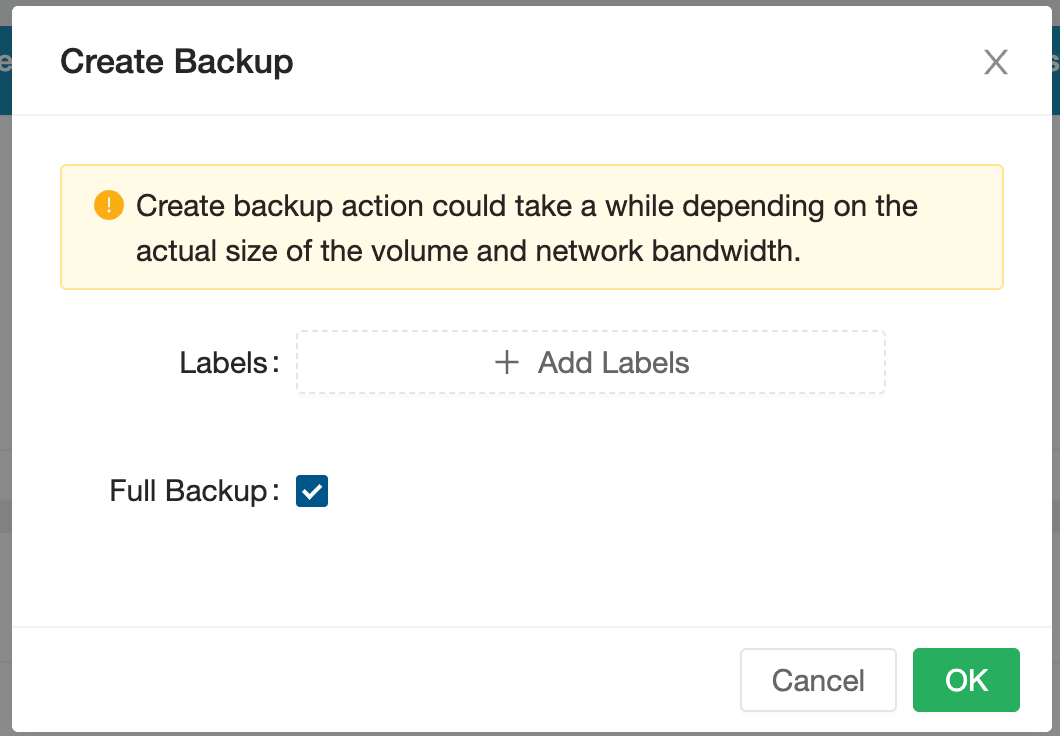
Step 3 — Create a Backup
With the volume detached, navigate to the Grafana volume and create a backup. In the Longhorn UI, click on the volume → Create Backup. Leave the label empty.
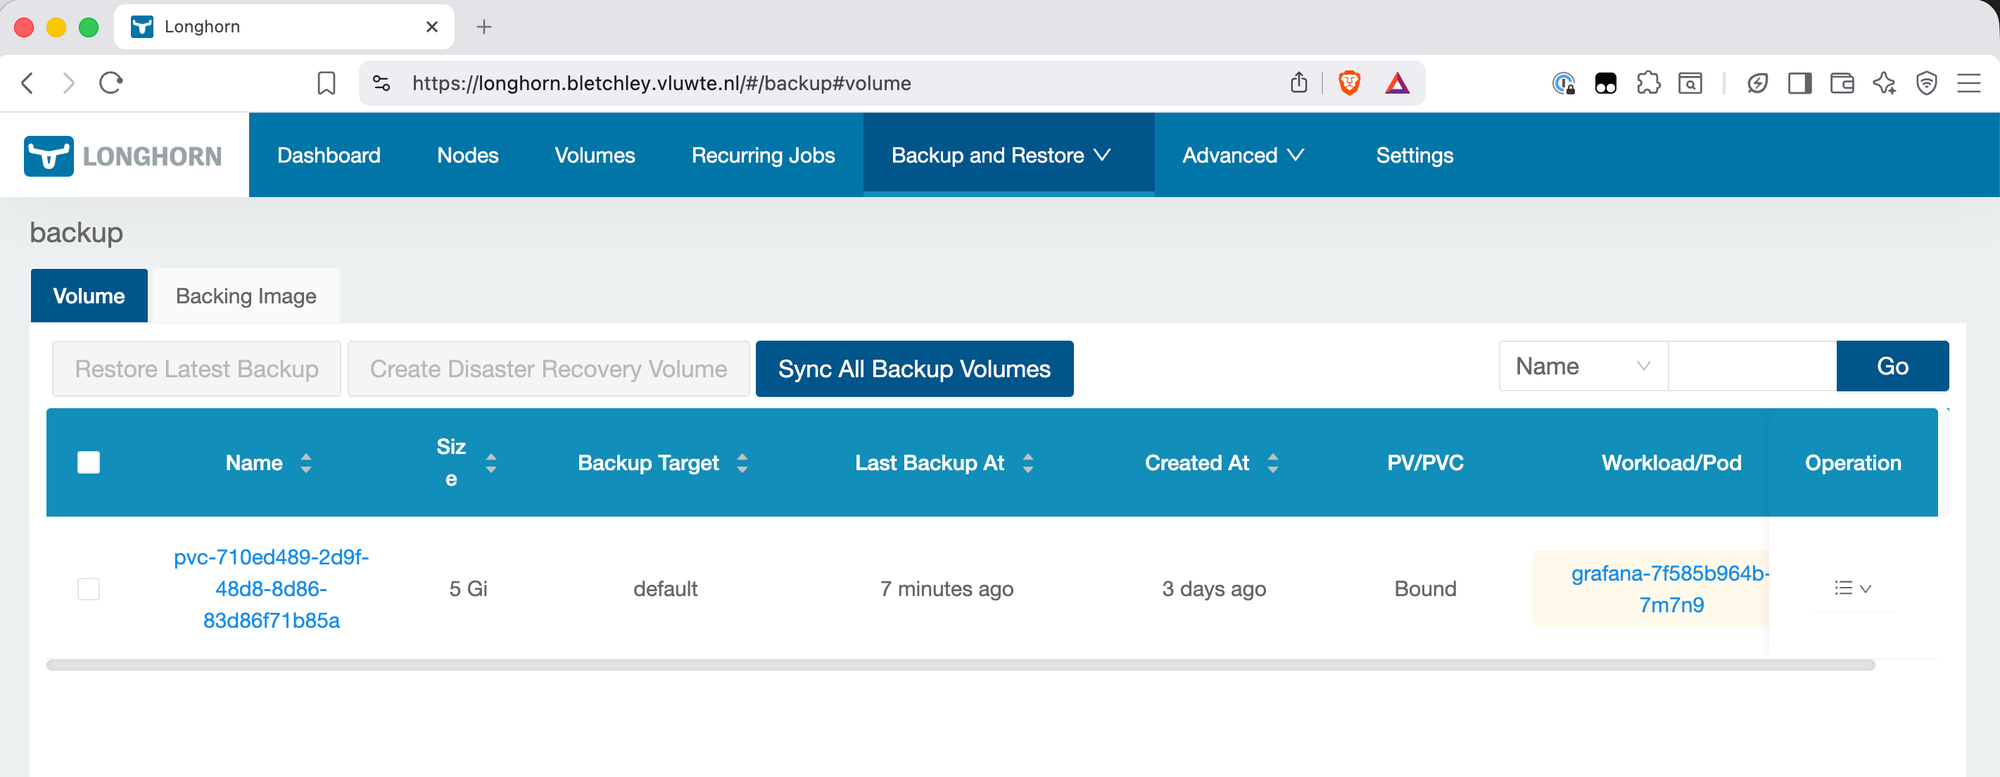
Step 4 — Confirm the Backup
Navigate to Backup and Restore → Backups and confirm the backup appears with status Completed.
Step 5 — Delete the PVC
This is the point of no return for the test. Delete the PVC via kubectl:
kubectl delete pvc grafana -n monitoring
# persistentvolumeclaim "grafana" deleted from monitoring namespace
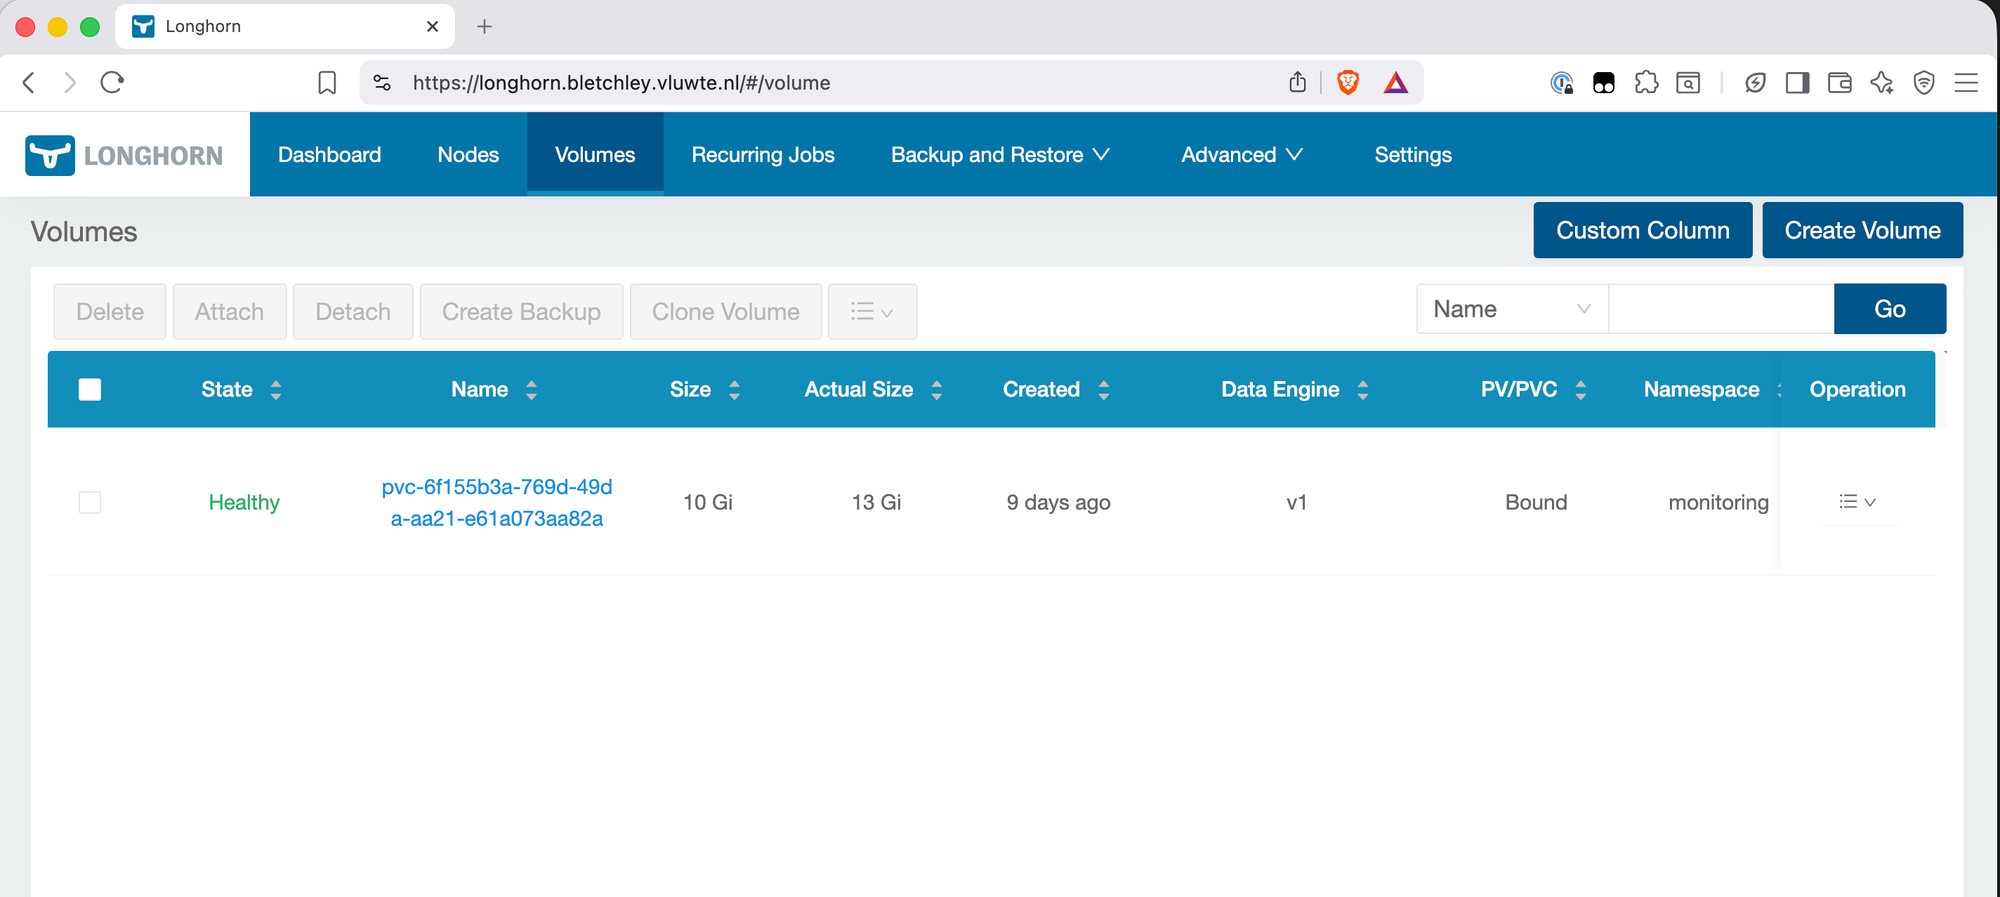
Check the Longhorn UI to confirm the volume is gone:
Step 6 — Restore from Backup
Navigate to Backup and Restore → Backups in the Longhorn UI. Find the Grafana backup (it will be listed under the PVC's original name). Click the menu (≡) and select Restore Latest Backup.
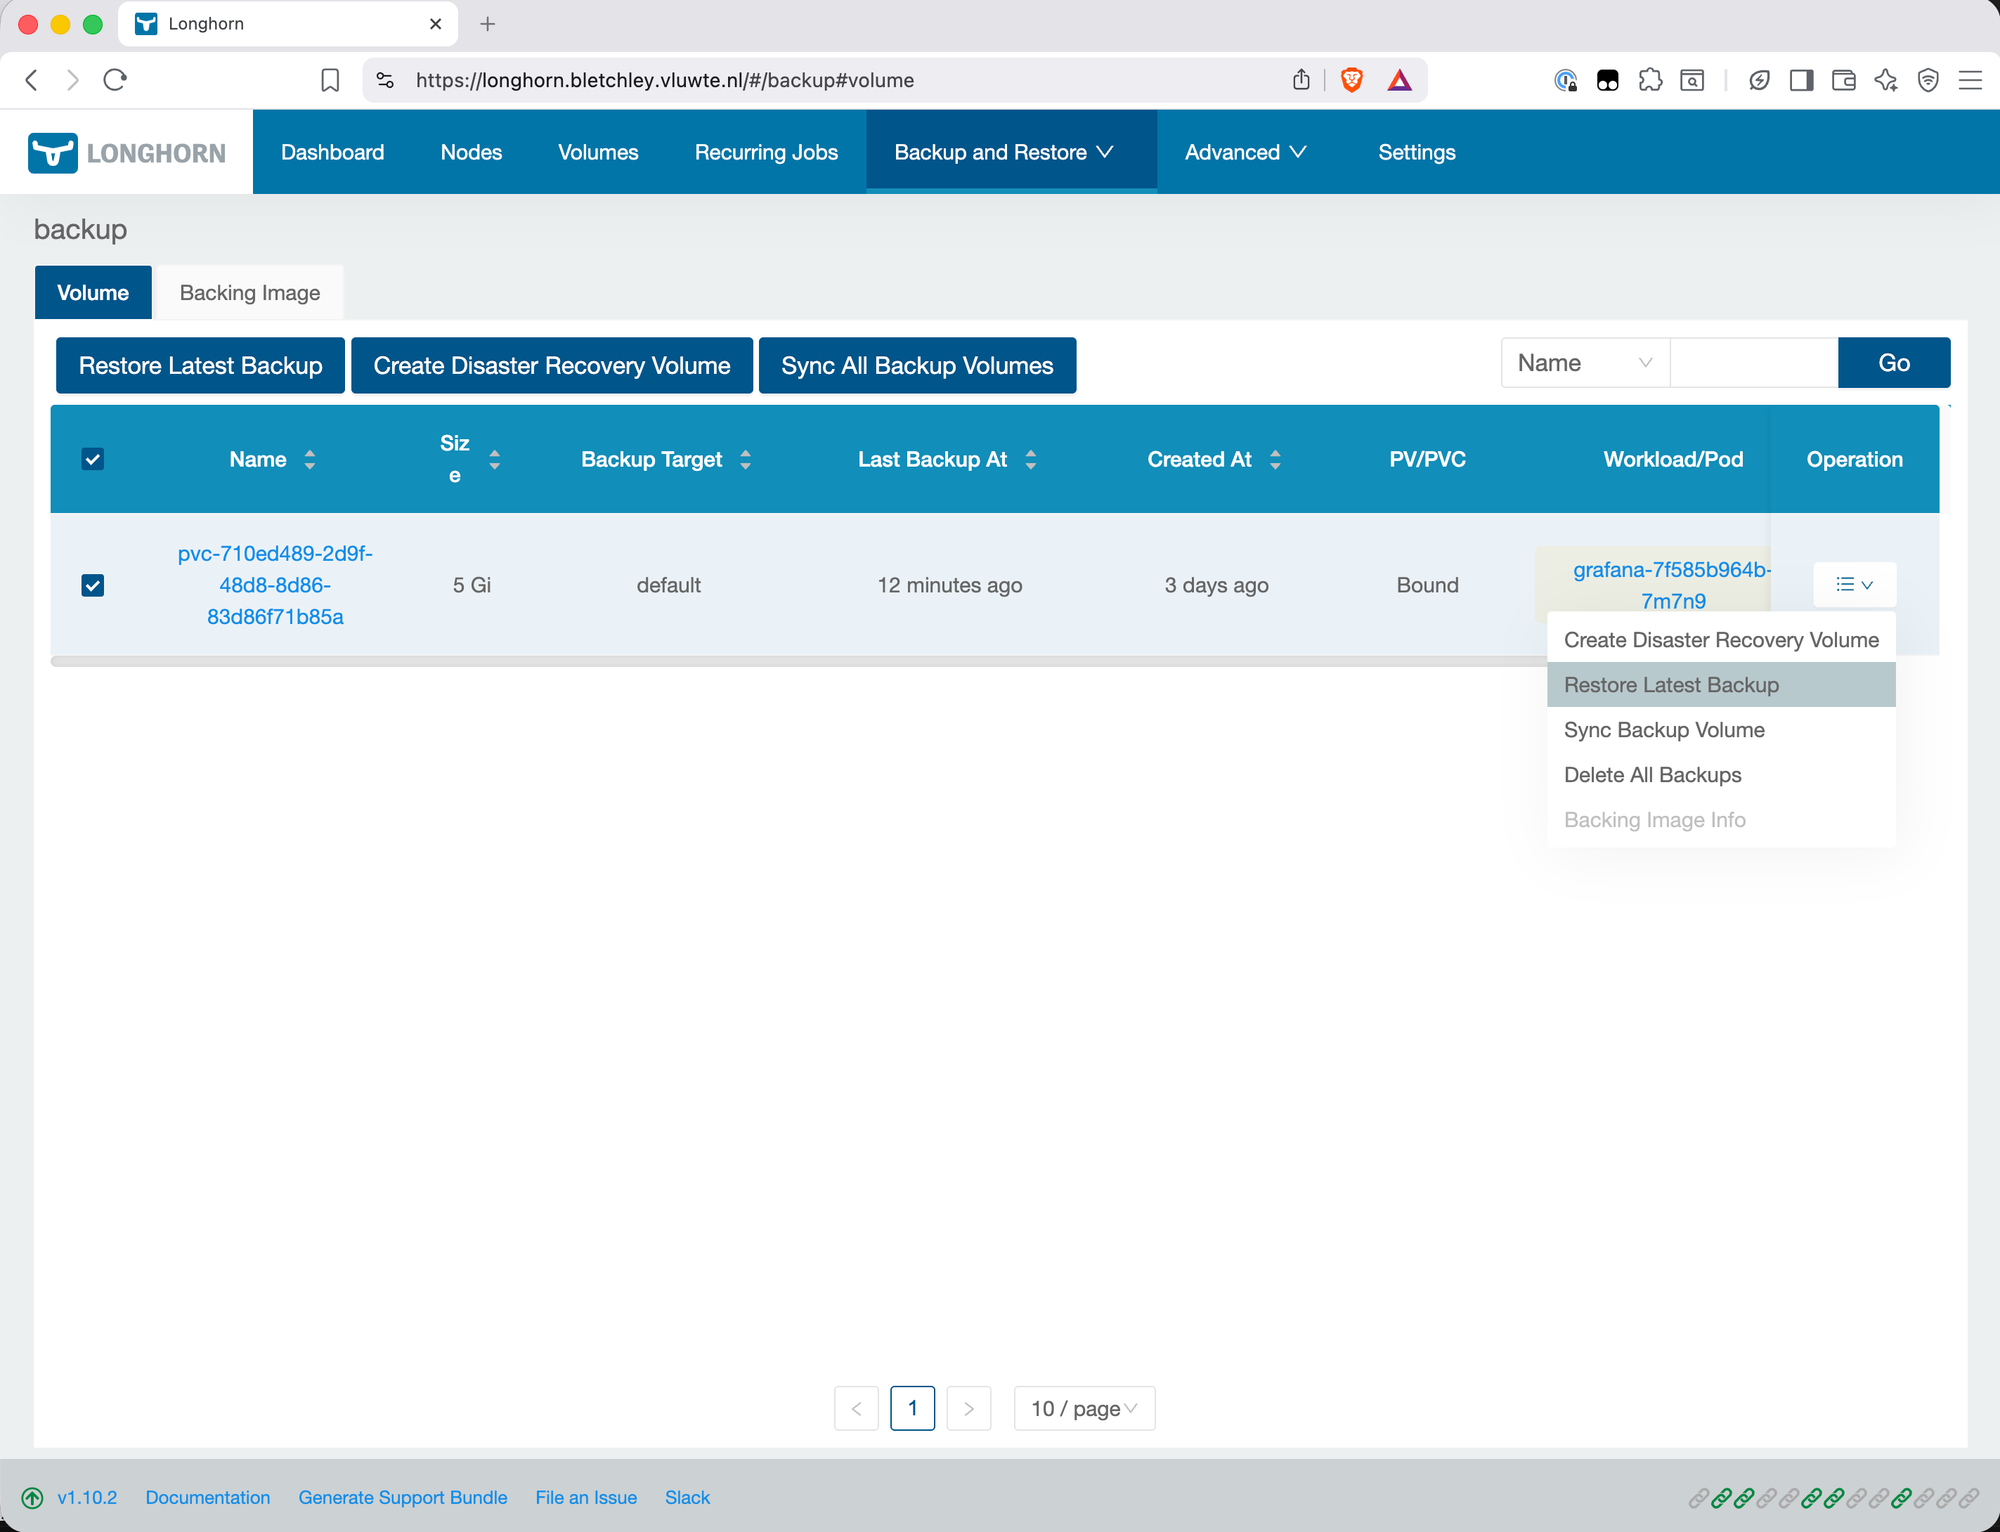
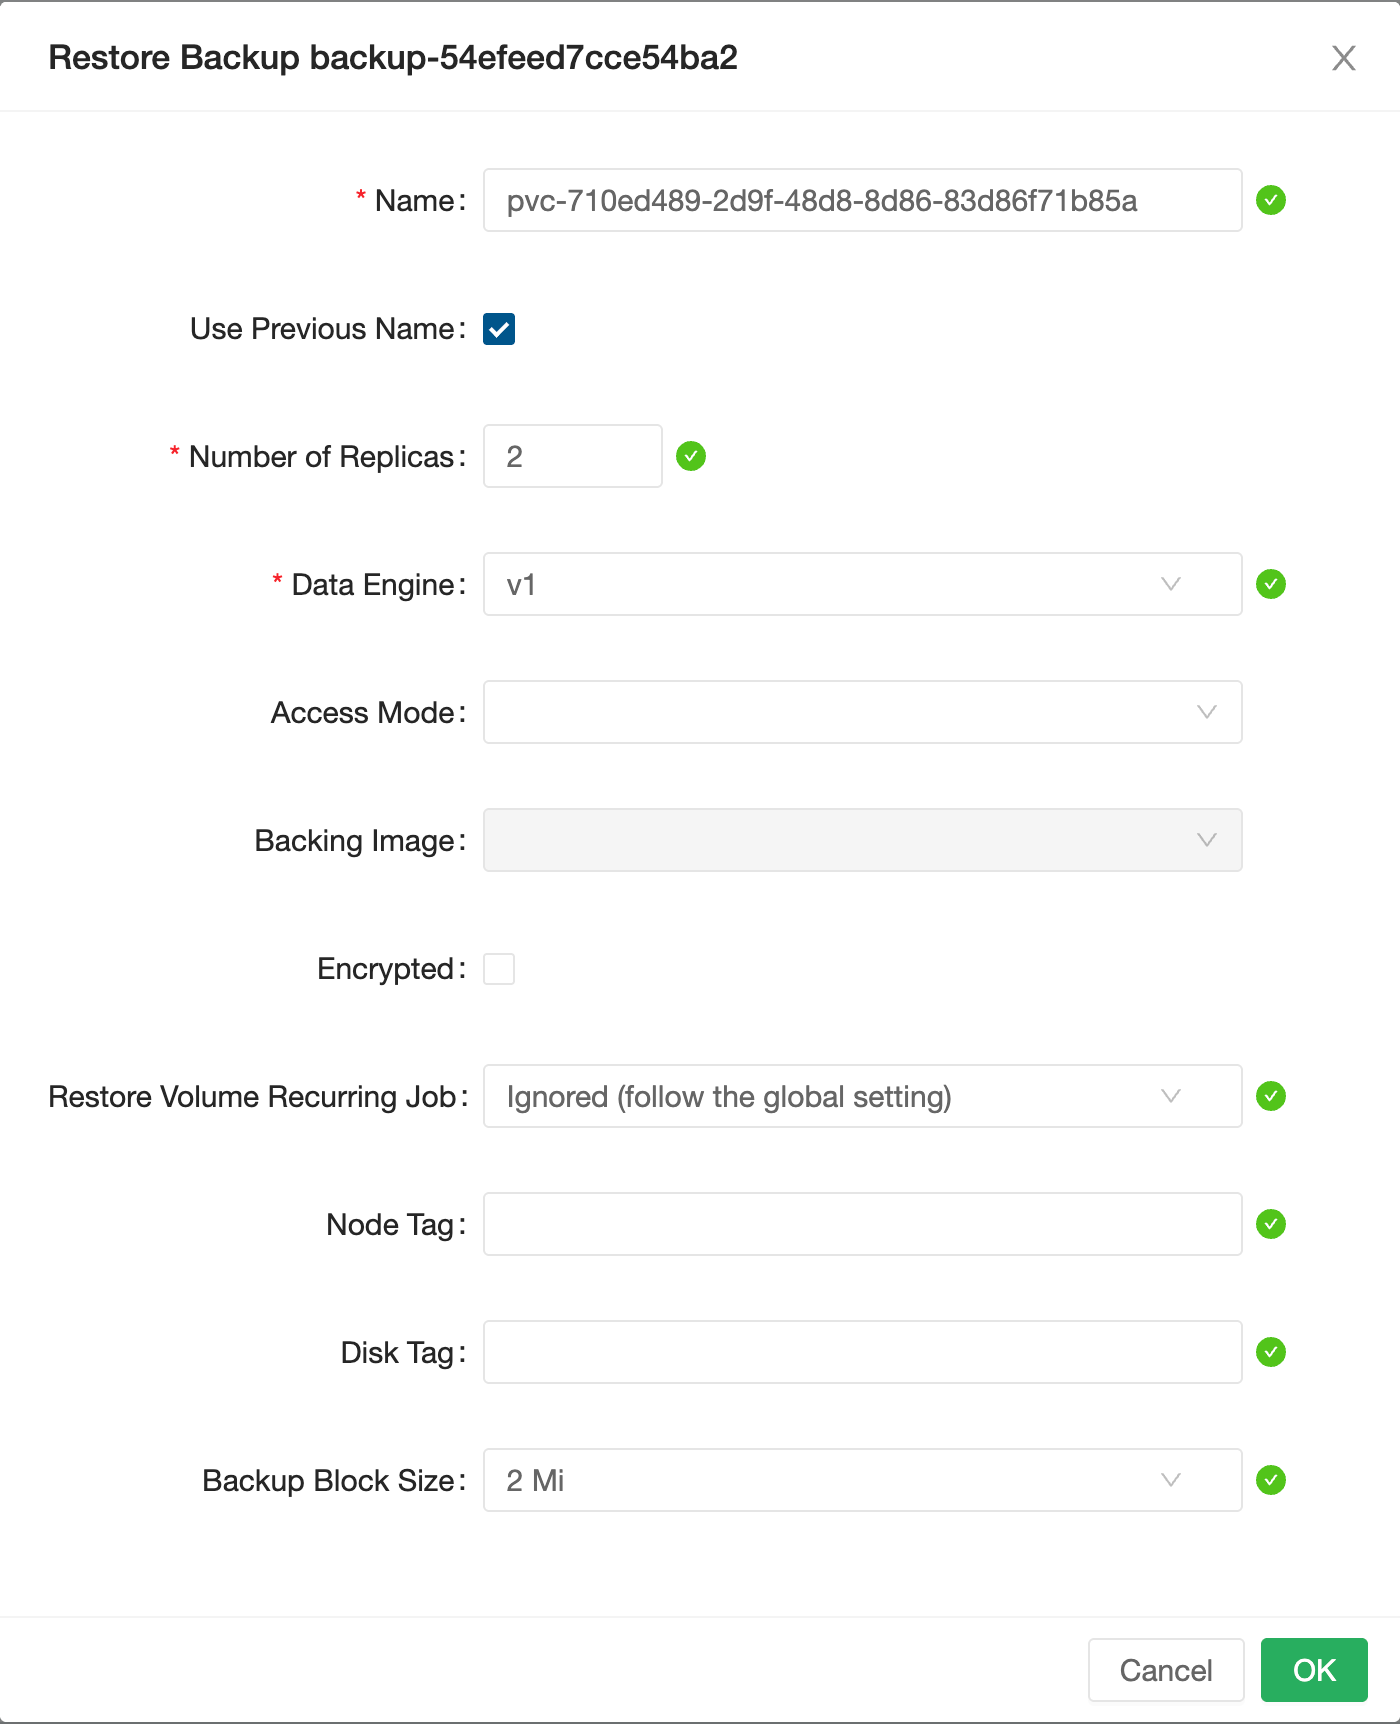
In the restore dialog, check Use Previous Name. This restores the volume with its original Longhorn volume name — important because the subsequent PV/PVC creation step will reference this name. If not checked, Longhorn generates a new pvc-<uuid> style name. When you then try to create a PV/PVC pointing at the restored volume, the name mismatch means the binding will fail — Kubernetes expects the PV to reference the exact Longhorn volume name.
After the restore completes, the volume appears in Longhorn with status Detached (or briefly Attaching as the data is loaded). It has no PV or PVC yet — Longhorn has the volume but Kubernetes doesn't know about it. Internally, Longhorn has recreated the volume object inside the Longhorn control plane, but Kubernetes still has no PersistentVolume pointing to it.
Step 7 — Create PV and PVC
From the Longhorn UI, click on the restored volume and select Create PV/PVC. Set:
- Namespace:
monitoring - PVC Name:
grafana
Leave other defaults in place. Longhorn creates both the PersistentVolume and the PersistentVolumeClaim with the right reclaim policy and access mode.
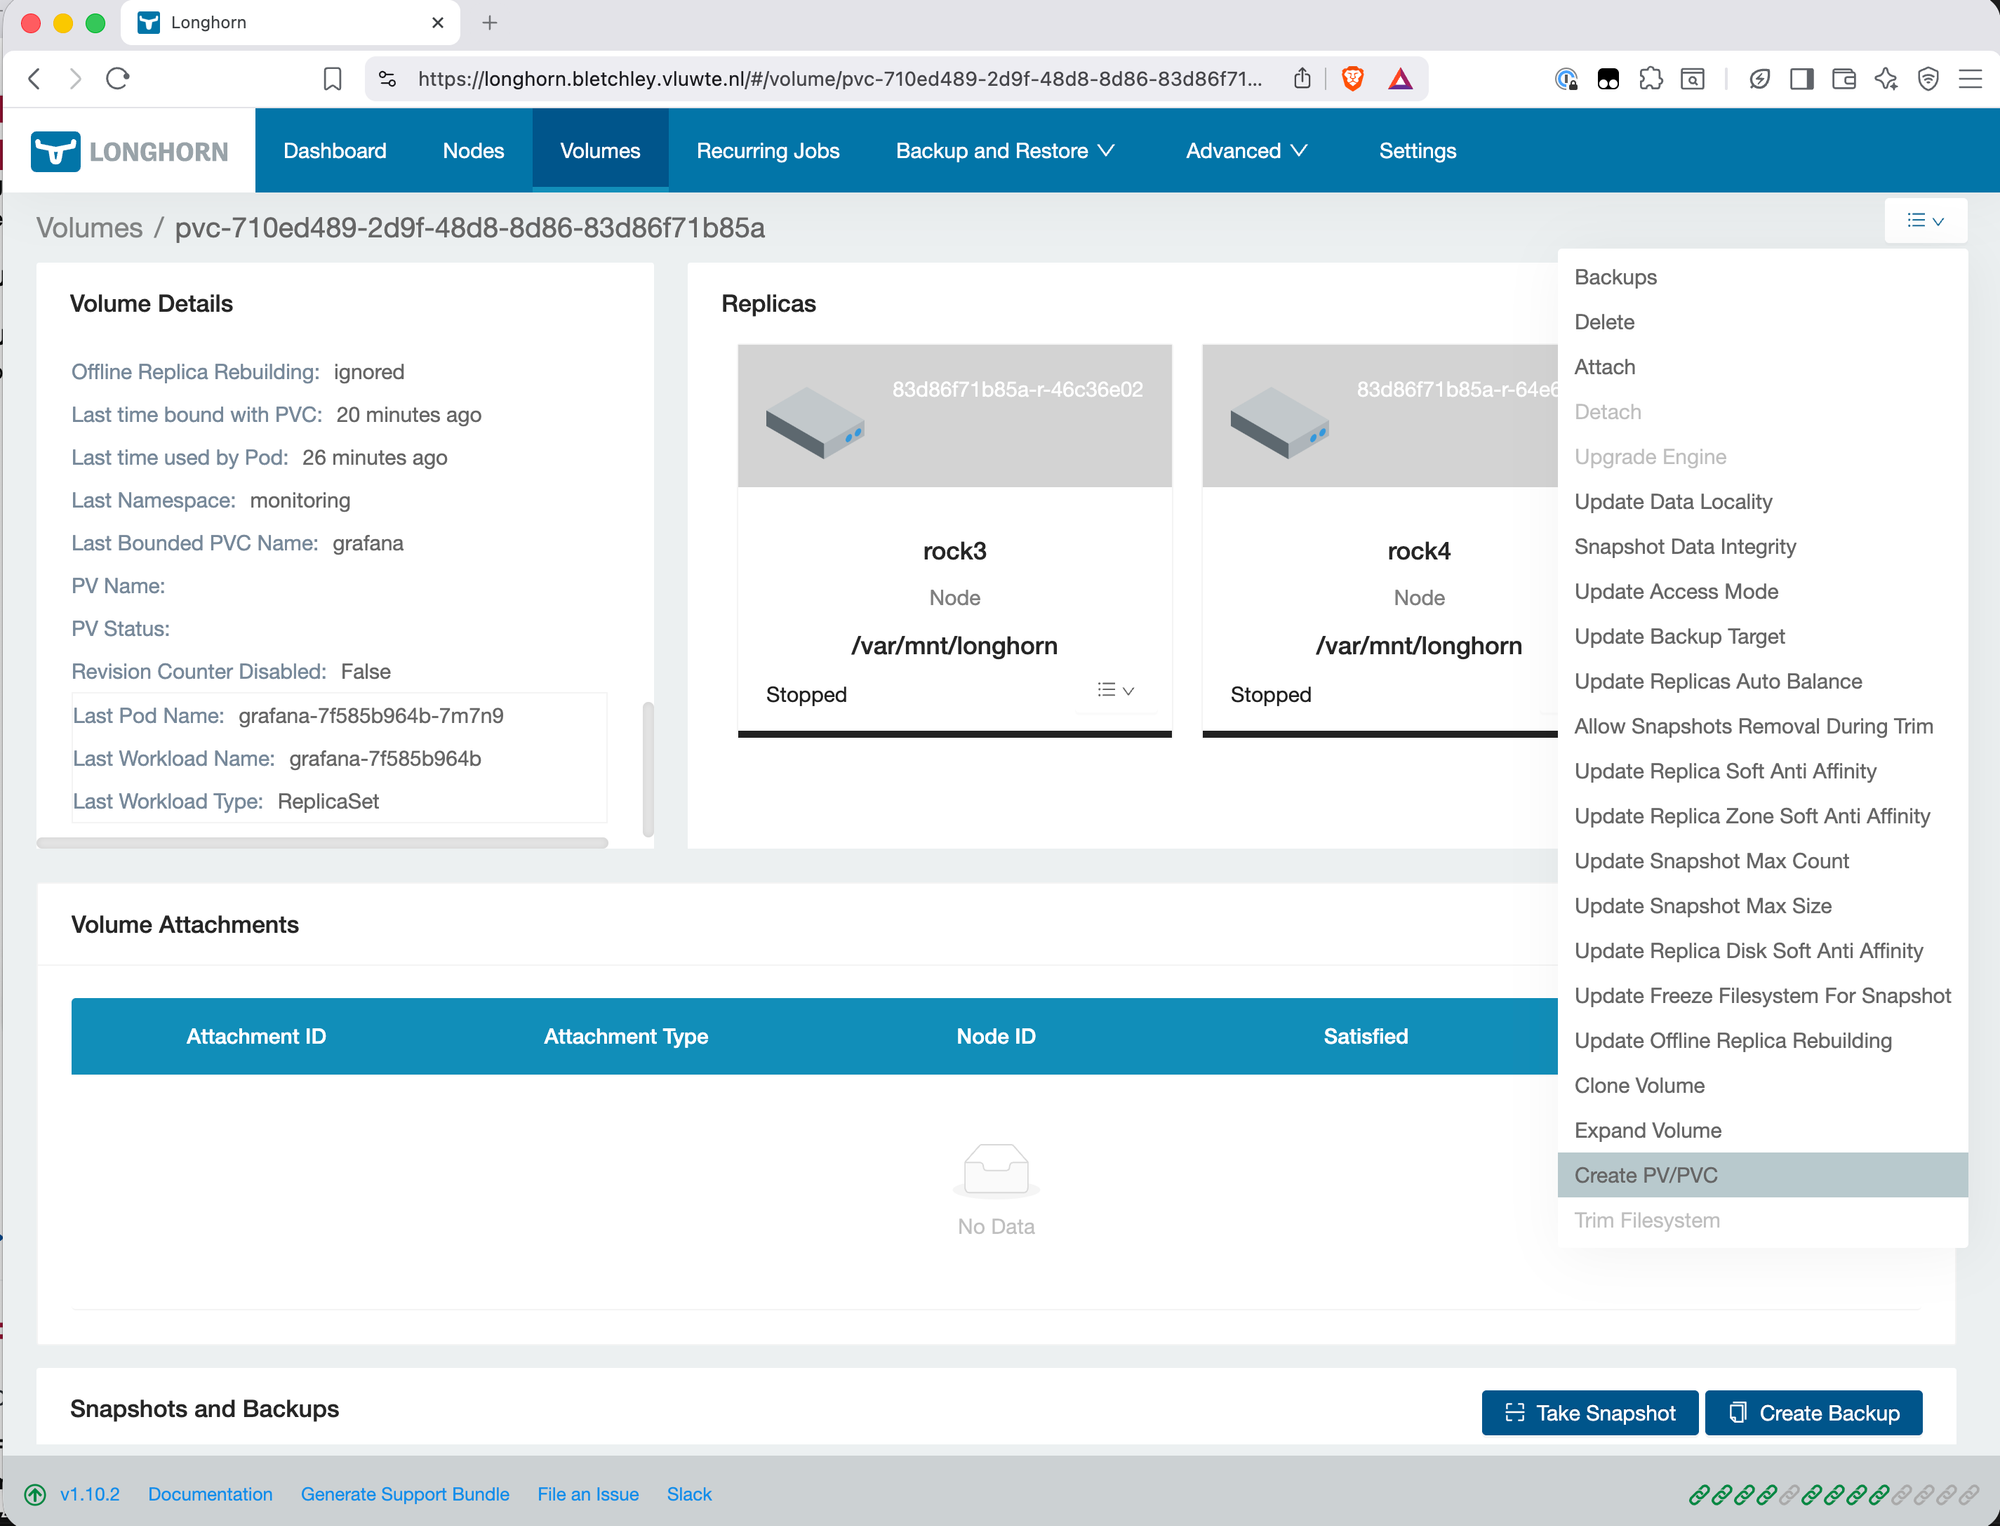
The volume status changes to Bound. Grafana's Deployment is looking for a PVC named grafana in the monitoring namespace — it will find it now.
Step 8 — Scale Grafana Back Up
kubectl scale deployment grafana -n monitoring --replicas=1
Watch the pod start:
kubectl get pods -n monitoring -w
grafana-7f585b964b-dl2lh   0/1   Pending         0   0s
grafana-7f585b964b-dl2lh   0/1   Init:0/1        0   0s
grafana-7f585b964b-dl2lh   0/1   PodInitializing 0   13s
grafana-7f585b964b-dl2lh   0/1   Running         0   14s
grafana-7f585b964b-dl2lh   1/1   Running         0   25s
25 seconds from scale-up to ready. Now navigate to the Grafana UI and verify the dashboards are intact. All dashboards, datasources, and configuration were present exactly as before the delete — nothing to reconcile, nothing missing.
Result: ✅ Scenario 1 complete. PVC deleted, restored from backup, Grafana running with original data.
Lessons from the Restore Test
Detaching before the manual backup was a choice, not a requirement. Longhorn can back up a volume whether it's attached or detached. For this test, Grafana was scaled down and the volume detached before taking the manual backup to guarantee a clean, consistent snapshot — there was no point running a restore test against data that might be in an inconsistent state. In normal operation the automated recurring jobs back up attached volumes without issue.
When restoring, add the volume to an existing recurring job — don't create a new one. The instinct after a restore is to go into Recurring Jobs and create a fresh job for the restored volume. This works, but leaves a stale orphaned job behind that has no volume attached. The correct approach is to navigate to the restored volume → Edit Recurring Jobs and add the appropriate existing job there. One job per workload, no cleanup needed.
The restore test confirms the mechanism works, not that recovery is lossless. A fresh manual backup was taken immediately before deleting the PVC, so this test restored with zero data loss by design. In a real incident, you'd be restoring from the last automated backup — anything written since then is gone. For this cluster running backups every four hours, the worst case is four hours of lost data. Knowing the restore mechanism works is valuable regardless: even an imperfect recovery is better than none.
How much work is needed after a restore depends on the workload. Grafana came back fully intact — dashboards, datasources, and alerting configuration all present, nothing to reconcile. A more stateful workload like a database might need a consistency check, transaction log replay, or manual steps to reach a healthy state again. It's worth thinking about this per workload before you need to do it under pressure.
The PVC name in Create PV/PVC must exactly match what the Deployment expects. Grafana's Deployment references grafana in monitoring. If the PVC name were anything else — grafana-restored, grafana-v2 — the pod would start with an empty volume, not the restored data. Using Use Previous Name in the restore dialog and then pre-filling the correct values in the PV/PVC creation step eliminates this risk.
The restore goes through Longhorn, not directly from the files. The Synology has a copy of the backup blocks, but restoring from the Synology requires putting those blocks back into a Garage instance and letting Longhorn read them from there. You can't unzip or copy files directly. This is Scenario 2 — the full DR test — and it will require considerably more steps.
Longhorn's backup format is the same whether the backup is on Garage or copied to Synology. The blocks are content-addressed. If the Garage S3 bucket is re-populated with the data from the Synology (via rclone sync in reverse), Longhorn can restore from it as if nothing had happened. The path from Synology back to a working cluster is: provision new cluster → install Longhorn → set up new Garage → rclone sync /volume1/dump/Bletchley/longhorn garage:longhorn-backups → configure backup target → restore volumes.
This test gives concrete numbers for RPO and RTO in this setup. RPO — the maximum data loss in a real incident — is 4 hours, matching the recurring backup interval. RTO — the time to recover a single PVC on a healthy cluster — is roughly 5–10 minutes based on this test, from scaling down the workload to Grafana running again with verified data. Both numbers will be worse in Scenario 2 (full cluster rebuild), where the bootstrap phase adds significant time before any volume can be restored.
Unintended Consequence: Recurring Backup Jobs
The restore test had a side effect that wasn't immediately obvious: deleting the Grafana PVC also broke its recurring backup job.
Longhorn's recurring backup jobs are tied by volume labels matching recurring-job selectors. When the PVC was deleted and a new volume was created through the restore, the original job's label selector no longer matched anything — so automated backups for the restored Grafana volume silently stopped running.
This is the key thing to understand: Longhorn does not automatically reassign recurring jobs to a restored volume. The restore creates a fresh volume, even if it ends up with the same PVC name in Kubernetes. The backup job's association is gone.
What I Did (Incorrectly)
Not realising this, I went into the Longhorn UI under Recurring Jobs and created a new job for the Grafana volume. This works — Grafana is now being backed up again — but it left me with a mess: three recurring jobs in Longhorn, and no easy way to tell which is for which volume. One is the original Grafana job (now stale, attached to nothing), one is the new Grafana job I just created, and one is for Prometheus.
How to identify which job is for which volume:
The Longhorn UI's Recurring Jobs page does not show which volumes a job is attached to — the columns are Name, Type, Schedule, Retain, Concurrency, Parameters, Labels, Groups, and Operation. There is no Volumes column. The UI gives you no way to tell the stale job from the active ones by looking at the Recurring Jobs page alone.
The CLI is the reliable way to sort this out. Two commands are enough.
First, list all recurring jobs:
kubectl get recurringjobs -n longhorn-system
NAME       GROUPS   TASK     CRON           RETAIN   CONCURRENCY   AGE     LABELS
c-afuh2t   []       backup   20 5/4 * * ?   8        1             18h     {}
c-bsl5cr   []       backup   10 5/4 * * ?   8        1             5d18h   {}
c-lsv43w   []       backup   10 5/4 * * ?   8        1             18h     {}
Then, check which jobs are actually attached to volumes:
kubectl get volumes.longhorn.io -n longhorn-system -o json | \
  jq -r '.items[] | .metadata.name as $vol |
    .metadata.labels | to_entries[] |
    select(.key | startswith("recurring-job.longhorn.io/")) |
    [$vol, (.key | split("/")[1]), .value] |
    @tsv' | \
  column -t
pvc-6f155b3a-769d-49da-aa21-e61a073aa82a  c-afuh2t  enabled
pvc-710ed489-2d9f-48d8-8d86-83d86f71b85a  c-lsv43w  enabled
The job that appears in the first command but not the second is the stale one — in this case c-bsl5cr. The AGE column in the first command makes it even more obvious: c-bsl5cr is 5 days old while the other two are 18 hours old, matching exactly when the restore work happened. c-bsl5cr has been deleted:
kubectl delete recurringjob.longhorn.io c-bsl5cr -n longhorn-system
What Should Have Happened
The correct approach after a restore is to attach the restored volume back to the existing recurring job, rather than creating a new one. In the Longhorn UI, navigate to the restored volume → Edit Recurring Jobs → add the appropriate job. Alternatively, label the volume directly via kubectl:
kubectl label volume.longhorn.io/<volume-name> -n longhorn-system \
  recurring-job.longhorn.io/<job-name>=enabled
Either way, the existing job picks up the new volume and no new job needs to be created.
Going forward: after any restore that involves deleting a PVC, check that the restored volume has the correct recurring jobs assigned. It won't inherit them automatically — this is an easy step to miss when you're focused on verifying that the data came back intact.
What's Next
Scenario 2 — Full Cluster Rebuild
The bigger test — and the one that actually validates the offsite backup chain — is rebuilding the cluster from scratch using only the Synology data. This means:
- Wipe and reinstall Talos on all four nodes from scratch
- Re-create the ZFS pool on rock3 (or restore it — ZFS pool import may work)
- Install Longhorn and Garage
- Reseed the Garage
longhorn-backupsbucket from the Synology rclone data - Configure Longhorn's backup target to point at the new Garage
- Restore each volume from the backup
- Redeploy workloads against the restored PVCs
There is a bootstrap problem that makes Scenario 2 non-trivial to plan. Longhorn restores from the S3 backup target — Garage. Garage runs as a Kubernetes workload. So to restore the cluster, I need a working cluster first. The path through this is to bring Garage up manually — either directly on rock3 outside of Kubernetes, or via a minimal kubectl apply before the rest of the cluster is functional — reseed it from the Synology data, configure Longhorn's backup target, and only then begin restoring volumes. This bootstrap phase requires careful planning and sequencing, and is the main reason a full DR test hasn't been run yet. It will get its own post.
The etcd backup from talos-backup makes step 1-2 faster — with a valid etcd snapshot, some of the cluster state can be recovered rather than rebuilt from scratch. The age-encrypted snapshot needs the private key from the password manager. That's a dependency to note: if the password manager is unavailable during disaster recovery, the etcd backup can't be decrypted. The recovery path still works without it — the cluster can be rebuilt from git configs — but having the etcd snapshot available saves significant time.
What's Working Now
- ✅ etcd backup CronJob running at 02:00 daily, age-encrypted, in
etcd-backupsGarage bucket - ✅
talos-api-access.patch.yamlapplied to rock1, rock2, rock3 — no reboot required - ✅ age keypair generated: public key in CronJob manifest, private key in 1Password
- ✅ Scenario 1 restore: Grafana PVC deleted and restored from backup on healthy cluster ✅
- ✅ Grafana running with original dashboards and data after restore
- ✅ Grafana recurring backup job reassigned to restored volume
- ✅ Stale recurring job identified and deleted
- ⚠️ Scenario 2 (full DR rebuild) not yet tested — planned
- ⚠️ etcd restore procedure not yet tested — decrypt command and import steps are documented but not validated under real conditions
- ⚠️ Longhorn backup format requires Garage to be running to restore — direct file access from Synology is not sufficient alone
← Previous: Offloading Backups: Traefik, Wildcard Certs, rclone
→ Next: Version Control for the Cluster
Questions or suggestions? Leave a comment below or reach out at igor@vluwte.nl.